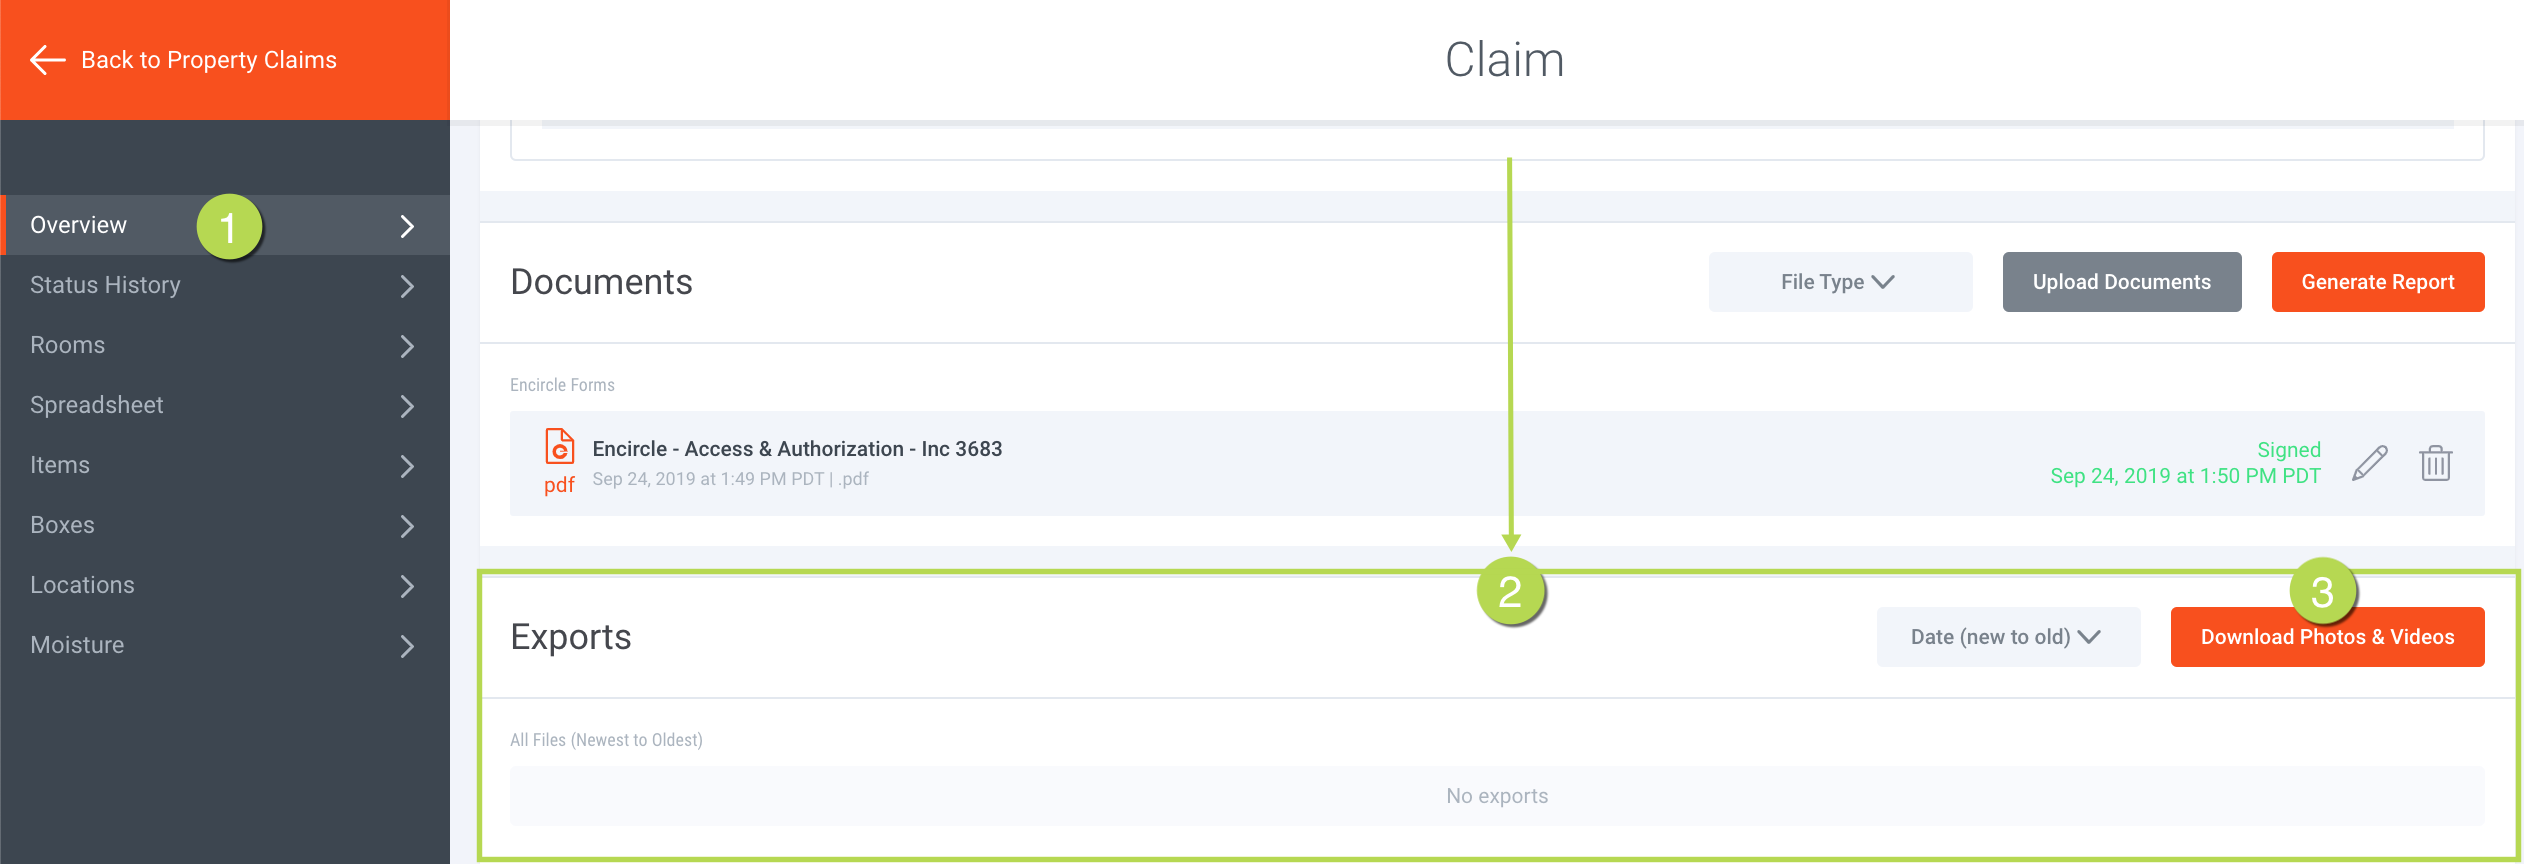
You can export specific images and media or use different filtering options.
- Open the claim in the Overview section.
- Scroll down to the Exports area.
- Click the Download Photos & Videos button.

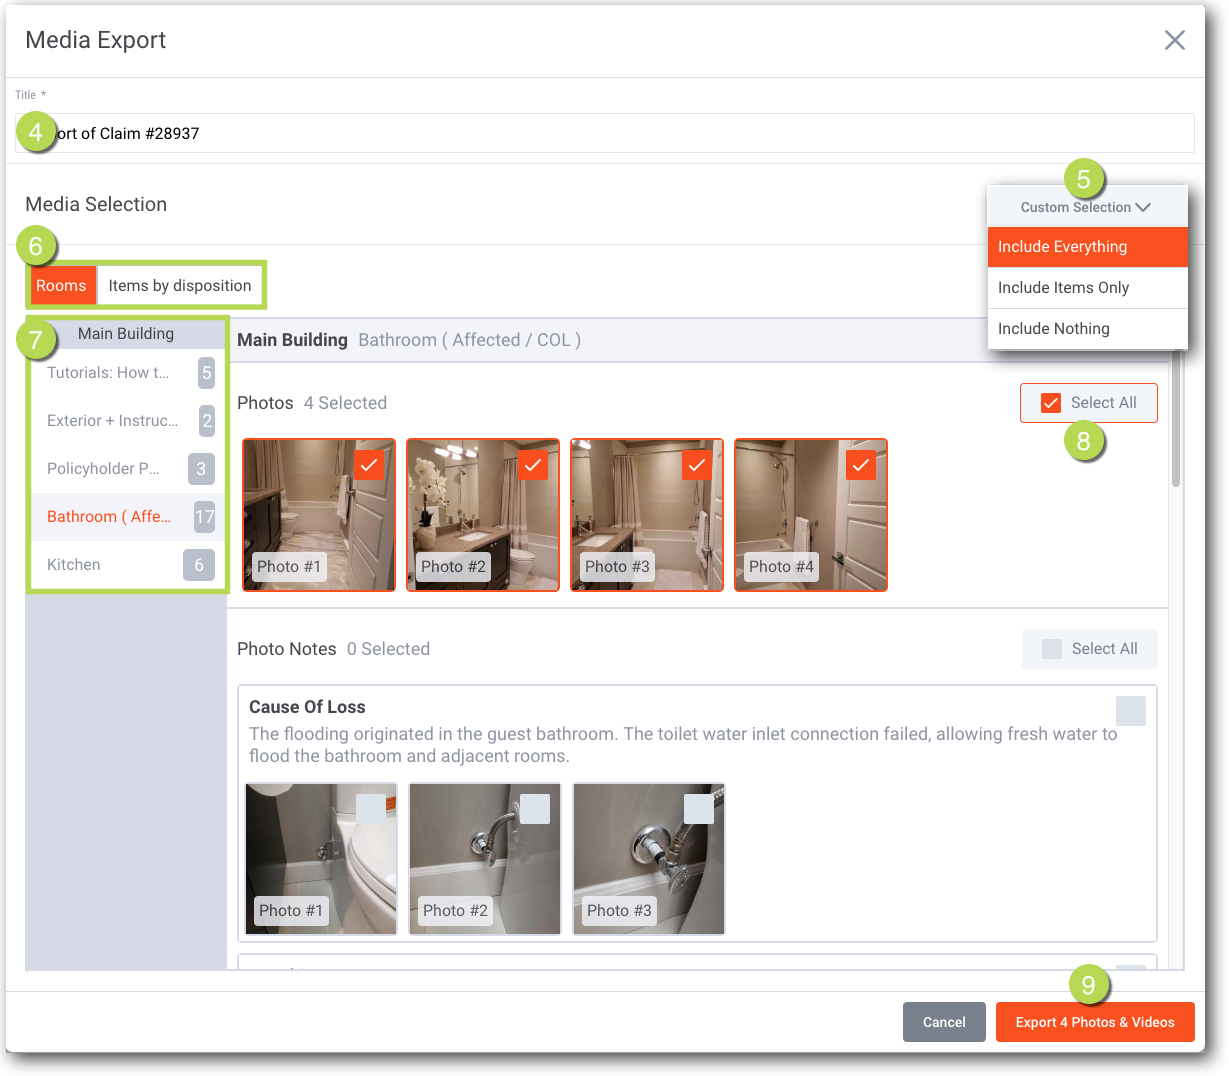
- Enter a title that best describes your media export. (perhaps the claim ID or Name of the policyholder).
- Use the Custom Selection to help filter the media. "Include Everything", will default the selection to include all media, afterward you can deselect specific media you do not want, or "Include Nothing" will default all media to "unselected" and you just select specific media to include.
- Use the Room / Items by disposition to navigate and select media from rooms and /or items.
- Click on the various rooms to adjust the media to be included or excluded from the export.
- Use the "Select All" function to quickly make group selections or de-selections.
- After selecting the media to be exported, click the Export x Photos and Videos.

- When the export is ready you'll see a new icon that represents your media export. Click on it to download the ZIP file to your computer.
- You'll be prompted for where to save the Zip file. After it has downloaded to your local drive you can click on the Zip file to expand unpack/expand on your local drive.

Updated